My front enclosed porch had been in desperate need of a renovation since the day I moved in 5 years ago. Everything in this space from the drop ceiling tiles, paneled walls, vinyl plank flooring and the trim work needed to go. This was the first area you saw when walking into our home and it was lack luster. After working on other areas of our home that needed attention first, it was finally time to give the front porch a facelift. Here are the before pictures. Brace yourself…


Pretty bad right? Peep my thumb in the corner, whoops 🙂 The plan was to rip everything down right to the studs, then recreate this space with drywall and new flooring. Mind you, I had never installed dry wall! So I started by doing a lot of research. I watched lots and lots of YouTube videos, asked lots of questions to my handy friends and family, and read a few blog posts in order to obtain as much information and education on how to install drywall as I could. The reason I explain so in depth how clueless I was prior to taking on this project is to motivate you. I want to prove to you that you can also do this type of work in your home as a DIYer! I am no professional! But with a good amount of preparation and determination you’ve got this! After doing lots of research and still not feeling overly confident, I figured I just needed to start with the demo to hopefully light a fire under my butt to just do it. So, down came the dropped ceiling tiles, trim work, paneled walls, and vinyl flooring. After seeing it bare to the bones is when I started to feel like oh boy, maybe I have bitten off a little more than I can chew.

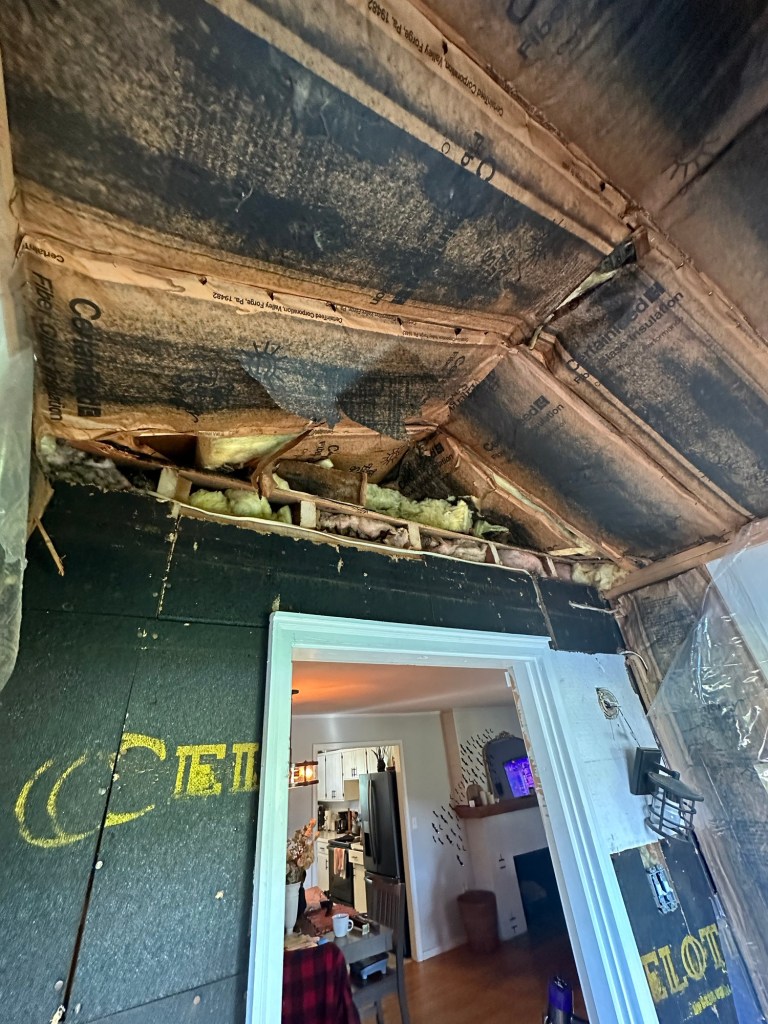
Unfortunately and fortunatly after taking down the drop ceiling panels, I found good news and bad news. The good news was the beautiful A frame ceiling which I was SO excited for. The bad news were these joists sticking out over the front door. Originally my plan was to put drywall on all of the walls and the ceiling. But first I needed to figure out what to do with these joists getting in my way. I phoned a friend, being my wonderful dad. Thankfully he came over, took a look, and was able to trim back the joists to make them flush to the wall. PHEW.

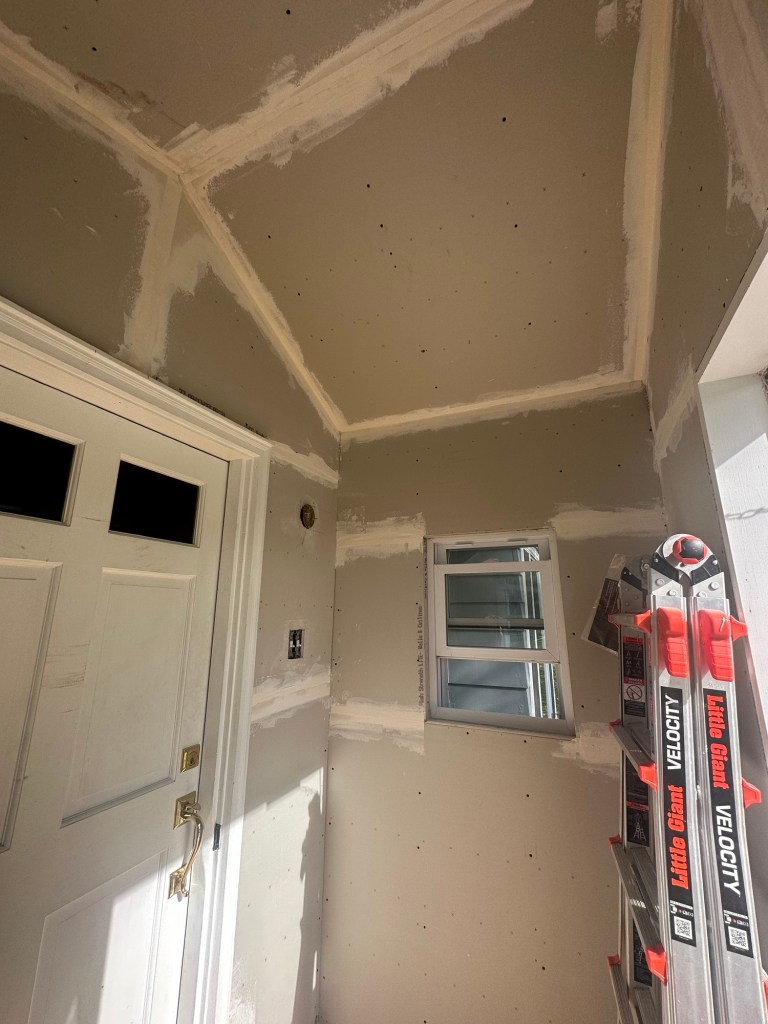
I was now ready to tackle the drywall. I purchased these drywall panels. I ended up using a total of 8 – 4x8ft 1/2in panels on both my walls and ceiling. I started on my ceiling first by cutting 2 drywall panels to the size of each side of the A frame ceiling. To cut the drywall you simply use a box cutter to score the back of the sheet then bend and break the drywall. It’s really so simple. You just need a box cutter. I also did end up purchasing and using a drywall rasp. This tool helps smooth the cut drywall edges. I did not end up buying a T square which a lot of my research stated I needed. Instead, I used random straight pieces of scrap wood as my straight line. After my ceiling pieces were cut, I screwed them into the joists of the ceiling with drywall screws. I purchased these 1-1/4″ drywall screws and used my drill to screw them into the joists every 8in or so apart. I was able to hold and screw the panel into the ceiling on my own, but an extra set of hands would be necessary for sure if you have a bigger room.

I wasn’t thrilled with the large gap between the sheets of drywall but knew I could fix that with joint compound in the next step! After the ceiling panels were up, I was feeling ready to tackle the walls. I used the same technique by simply measuring, scoring and cutting the drywall to fit the area of my wall. Then, secured the panel with drywall screws into the studs. A stud finder came in handy for this!
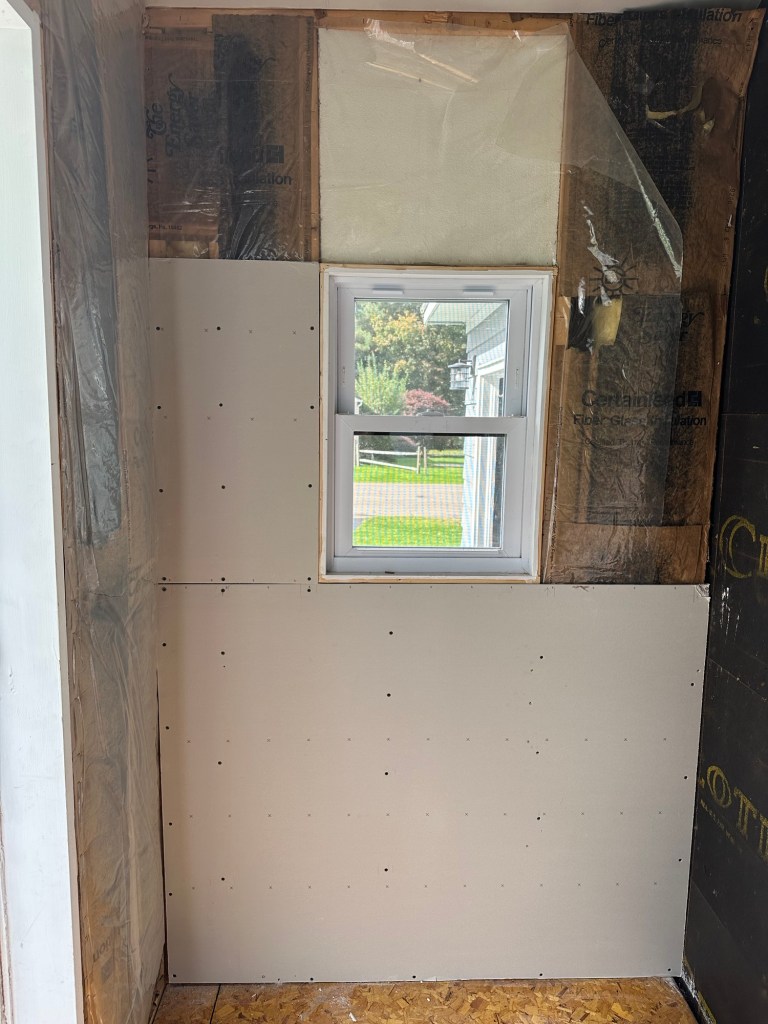
Although this was super time consuming, most likely due to it being my first attempt at installing drywall, it was very simple and self explanatory. An impact drill will really come in handy. I unfortunately did not have one, and wasted a lot of time having to hand screw in the screws to the wall that my drill couldn’t screw in all the way. You want to just slightly recess the screws into the drywall. Making sure they aren’t sticking out, but you also don’t want to screw them in too much or you will go right through the drywall. You also want to be super careful with where you are screwing into. Pay extra careful around wires. You do not want to hit a wire on accident. As you can see, due to the weird shape of the walls I used several drywall pieces to cover the walls completely. I aimed to be as precise with my measurements as possible in order to get the drywall as close to the adjacent drywall piece as possible but it does not need to be perfect. Drywall tape and joint compound will fix all of the gaps and imperfections. The last drywall to cut were the pieces around the window sills. Here is how the front porch looked after I finished putting up the drywall panels! At this point I was SO excited and relieved to be done with this step. I was also just super proud that I created walls and a ceiling! Like wow?!

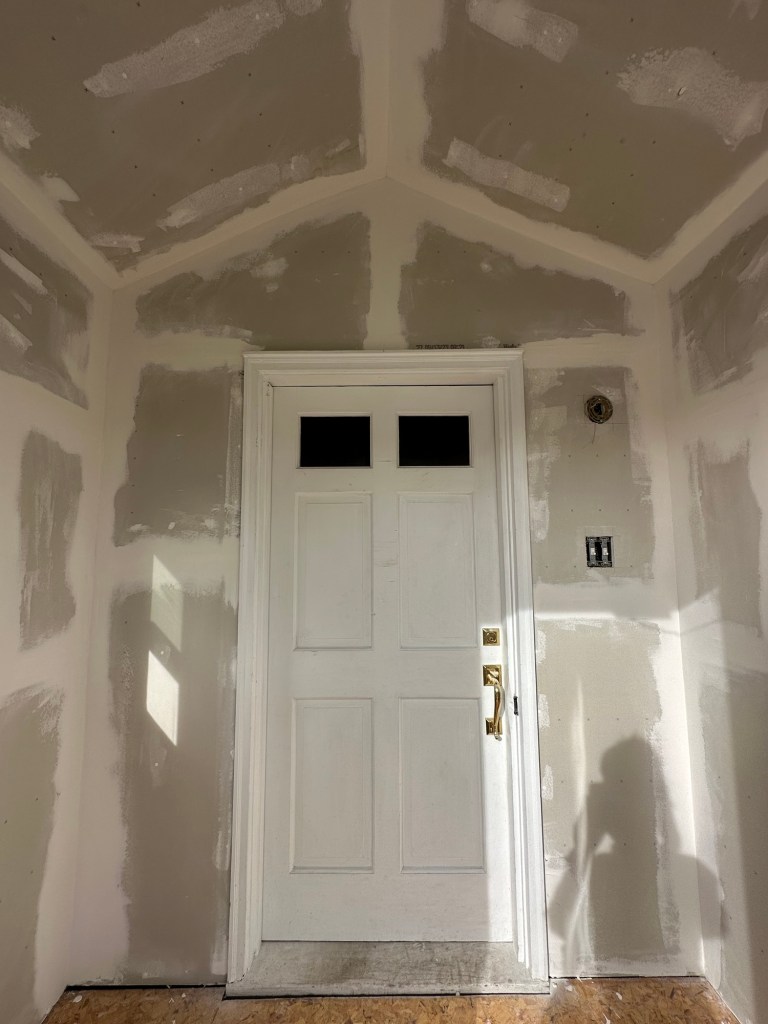
Next step was tape and joint compound! I started by mixing this quick set lite setting joint compound with water to create a thick consistency. I applied a thin layer of joint compound using a taping knife to the spaces where two pieces of drywall met each other. I then applied my tape over that thin layer of joint compound. I then applied another thin layer of joint compound to seal down the tape. Then smoothed that down with my taping knife, removing any excess joint compound. Once that dried, I then used pre mixed lightweight joint compound to go over everything one more time. I also filled in the screw holes with this joint compound.
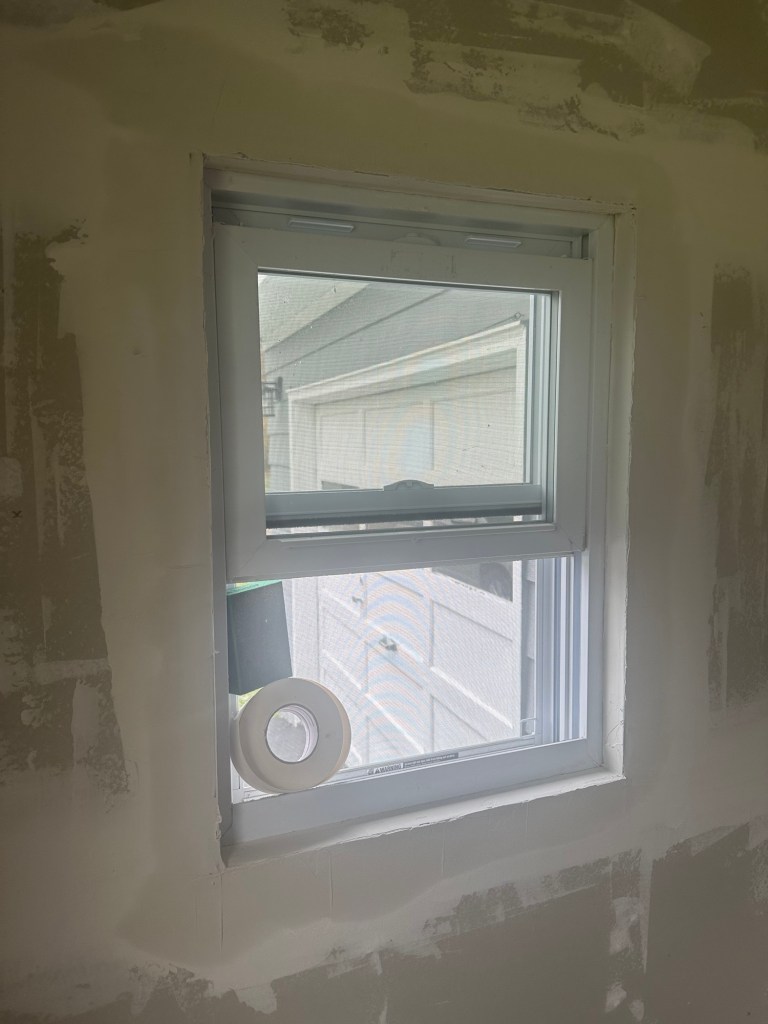
For the windows I used corner beed. I bought snips to trim the corner beed to size per the size of my window. I used the joint compound and tape again to almost “glue” the corner beed down then smoothed it out just like pictured below.
After the joint compound was fully dried, it was time to sand! I used a 220 grit sanding block to smooth down all of the rough areas that I did not get completely smooth with my taping knife. I then vacuumed all of the dust and debris to clean the space up! Here is how the area looked after I was done taping, mudding then sanding!
Next I was ready to prime YAY! I applied 2 coats of primer to ensure the walls were nice and prepped for paint. I used and love Zinsser BIN Primer. I then tried out a few paint samples. I am super indesicive so deciding on a color took me a while. This room gets a lot of light so the color changed throughout the day depending on the time of day!

Ultimately I ended up going with the color Sandalwood in eggshell. It is a Valspar color swatch that I had color matched into a Behr Ultra can. I LOVE how it turned out.

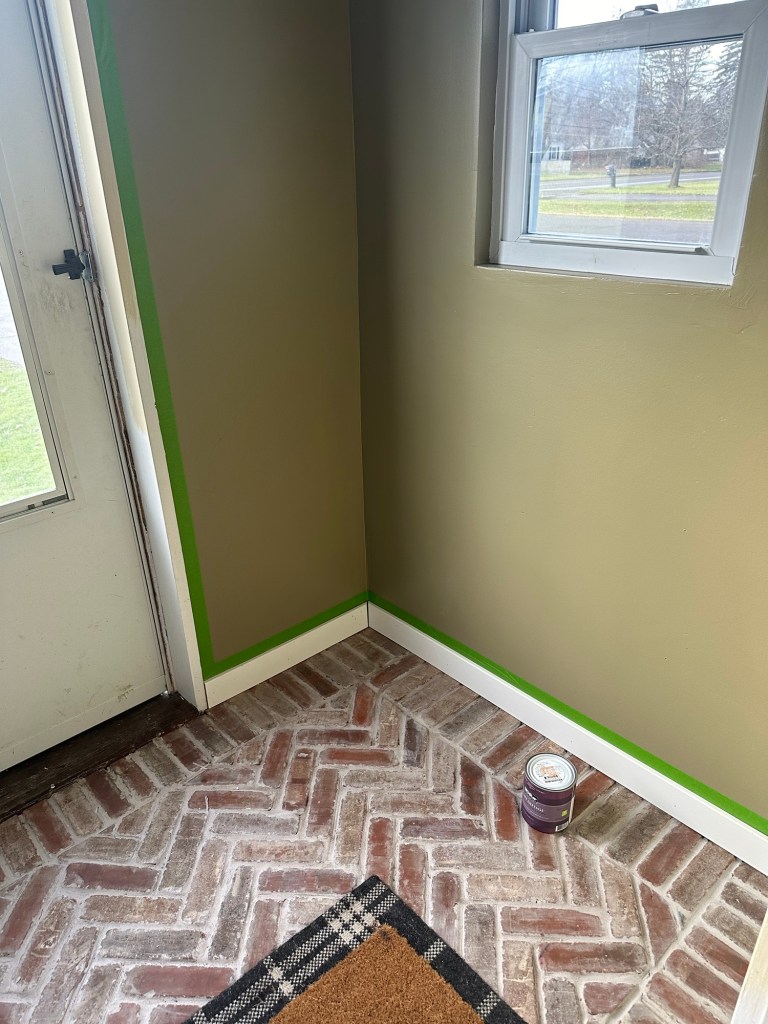
Next up was the floor. I ended up going with a thin brick flooring. I laid out a border around the room pictured below. For the border I used these single brick pieces in the color castle gate and secured them to the subfloor with loctite.

Some pieces needed to be trimmed. I pulled out my wet tile saw for this. My first time using this saw I was terrified. I promise you it is so simple to use once you get a hang of it. If I can do it, you can do it!
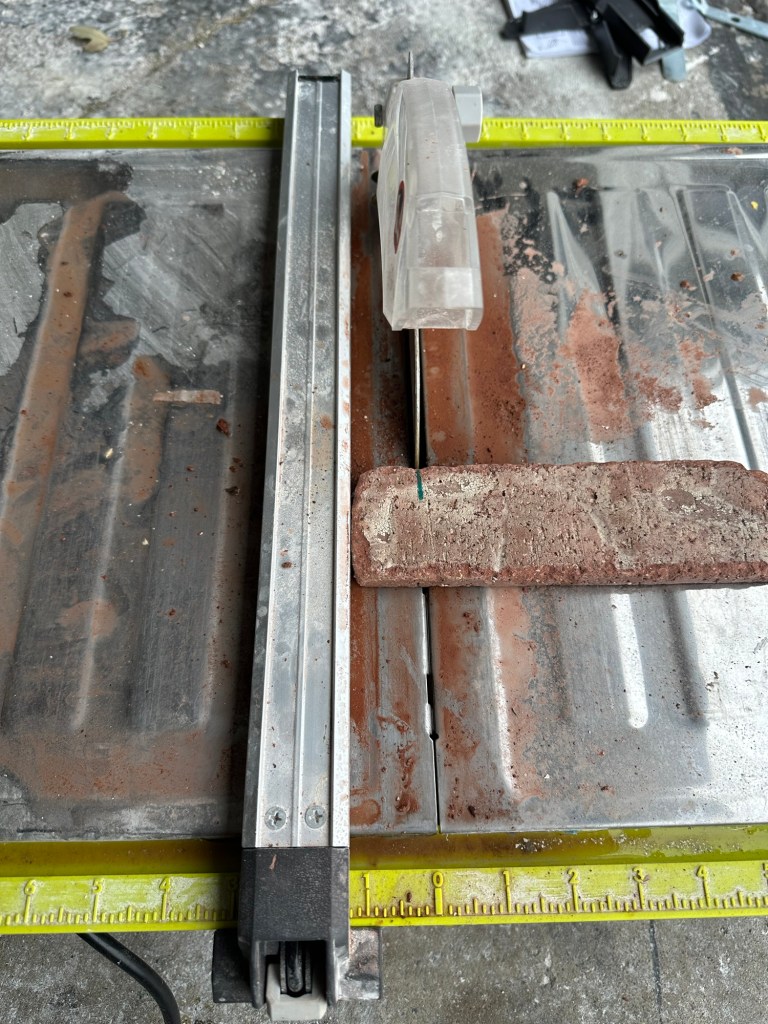
After I finished laying the perimeter with the single brick pieces, it was then time to lay the herringbone pattern. I purchased these herringbone thin brick sheets in the color castle gate. I first laid out the full sheets and again secured them to the subfloor using loctite with my caulk gun. After all of the full sheets were down, I pieced together the remaining bricks to finish the pattern. A lot of trips to the tile saw were made in order to trim the full pieces to size. It was like putting together a big ole puzzle.

After the brick was all cut to size and glued down it was time to grout! I used this grout in the color haystack. I mixed the grout with water to create a thick milkshake consistency. I then used a grout bag to pipe the grout in-between the grout. And smoothed it down with a damp sponge. Here is how the brick looked grouted vs not grouted.

After the grout dried it was time to seal it. This area is going to get a lot of traffic so making sure it was sealed was important to me. I applied two coats of this Valspar protective sealer.

Next was time for trim! I installed baseboards. Taped, caulked, and then painted them Alabaster – a Sherwin Williams color that I color matched and purchased in a Behr Ultra paint in eggshell.
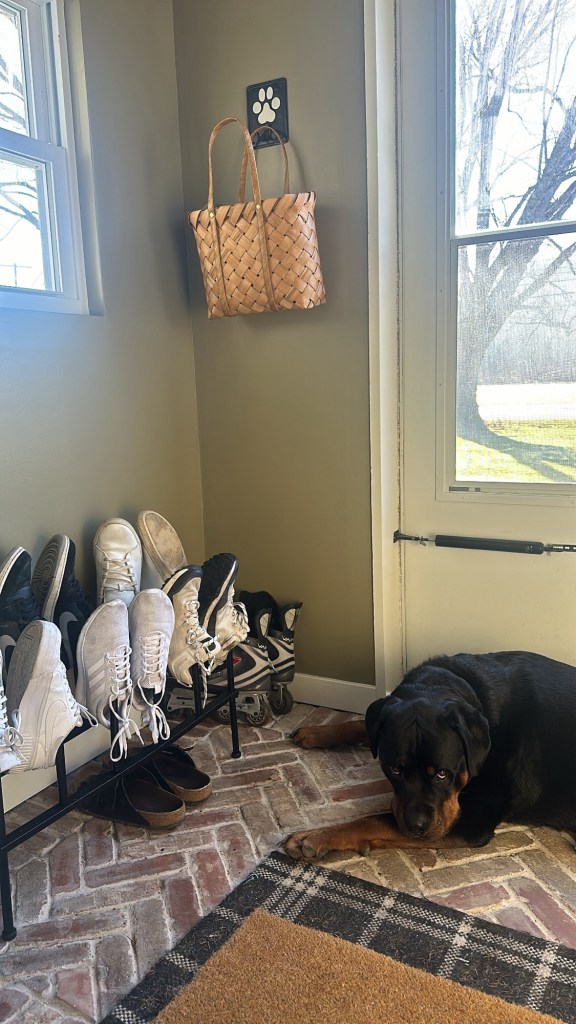
Next was time to decorate. The fun part! I had originally thought about building built in shoe storage cabinets, but ultimately wasn’t 100% that it was the look I wanted out here. So, I decided to go for a more temporary option until I made a decision for sure. I went with these budget friendly shoe racks that I love! And here is the after! I am so happy with the before and after transformation of this space. It was a labor of love and ultimately I am just so proud and happy with how it turned out! For more projects just like this be sure to follow me on Instagram!