After two years of living in a kitchen that very much needed an update, on a whim I decided to start the demolition process. On December 2, 2020 to be exact, is when the spiraling story of this DIY kitchen renovation began. In this post I will go through the timeline of the process, summarize what I spent in each phase of the renovation, and include lots of pictures of how the space transformed through each DIY. I learned so much during these past few months! Hopefully this post inspires you to take on your own projects and proves just how much you save by DIYing!
OK so first thing’s first (I’m the realist, jk lol) before pics!!
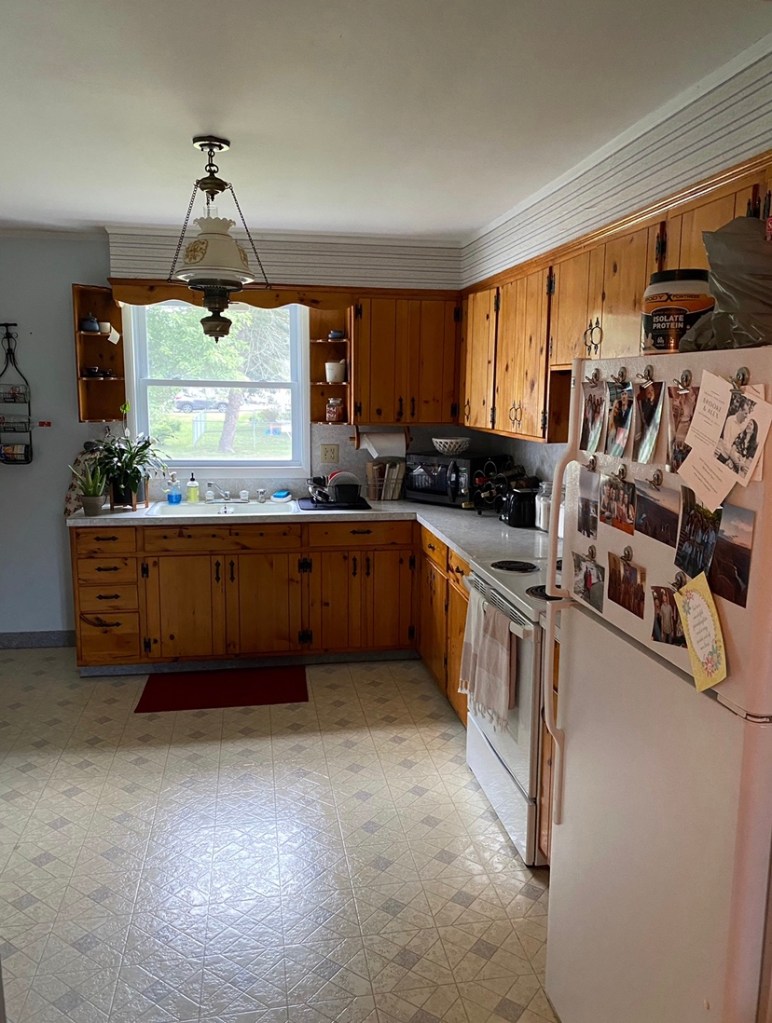
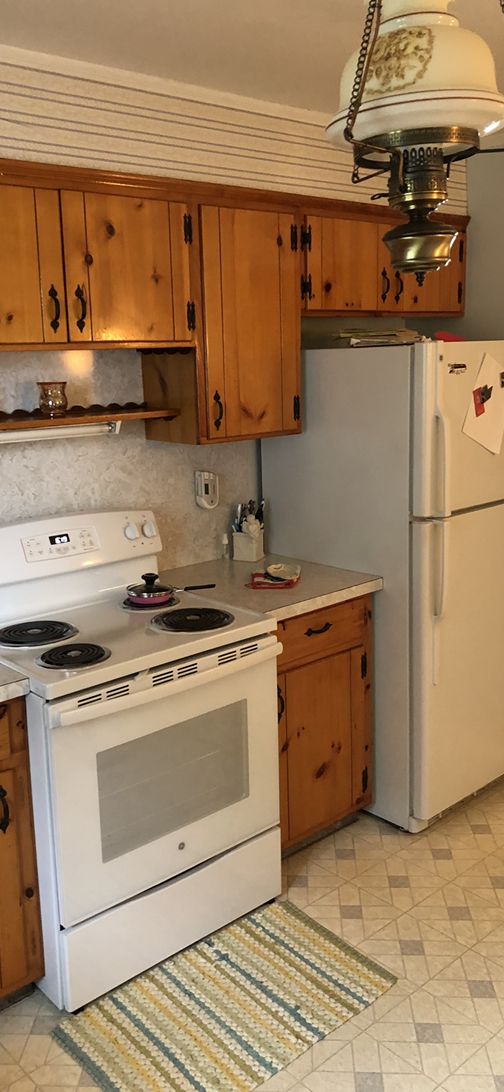

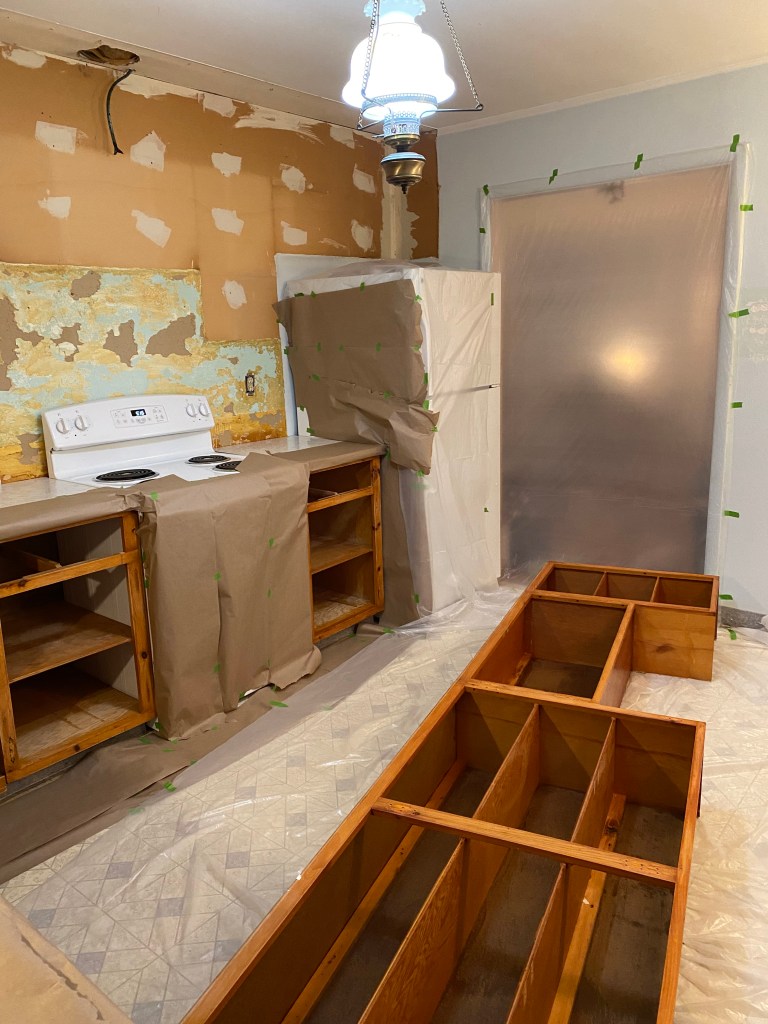
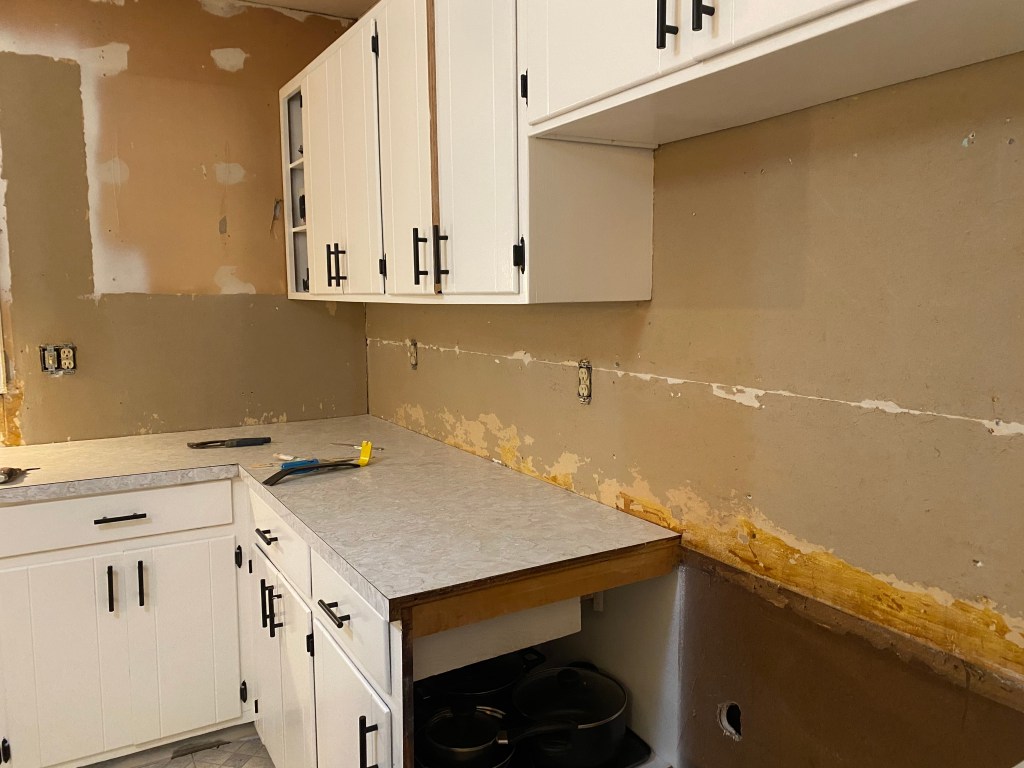
Yikes I know! I went into this with absolutely no plan other than I knew I didn’t want to spend a ton of money. Can ya blame me?! My budget was about $5,000-$7,000, I had wiggle room here but that was a rough idea of where I tried to stay. My demolition started with removing the wallpaper on the soffits, which was a waste of time because I decided F it, and just completely removed the soffits as well! I got rid of an upper cabinet, and removed all of the scalloped trim work. Here is what my kitchen looked like on December 3rd after about half of the demo was completed.

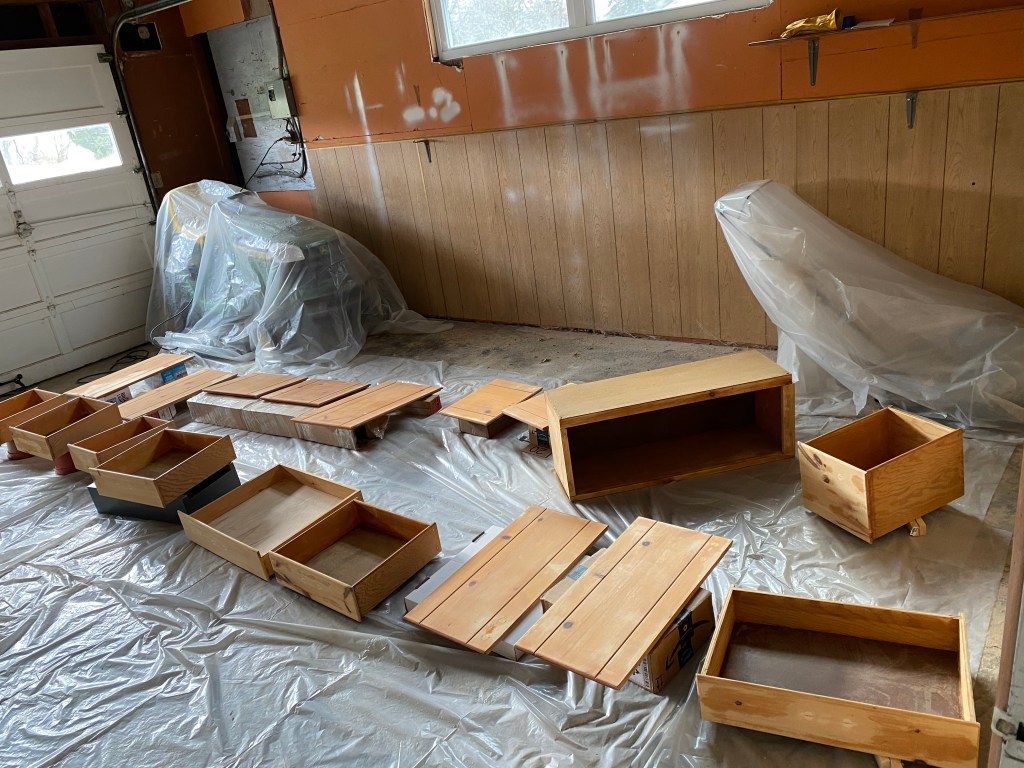
I still needed to remove the laminate backsplash (which was a PAIN in the rear), the other soffit, and the flooring. In the meantime, I started painting my cabinets. Read my tutorial on how to paint your kitchen cabinets here where I go into more detail. I spent in total $427.42 on my cabinets. This included a paint sprayer, primer/paint, hinges, pulls, and all other supplies to prep and paint the cabinets. Here is a picture of the prep during painting the cabinets and an exact moment in time where I thought I was in way over my head…
Below are the cabinets finished on December 19th. This process took much more time and energy than I had expected. It was a lot of work, but so rewarding, and worth it! It is crazy what paint and new hinges can do to kitchen cabinets!
After the cabinets were done and the rest of the laminate backsplash was removed, I needed to fix these walls. This is where I learned to skim coat. To prepare I had watched LOTS of YouTube videos and did my research. It was a tricky technique especially because I had never done it before. Thankfully my skim coat did not need to be completely perfect/smooth because all of the wall space was going to be covered by either brick, tile, or upper cabinet storage. I spent $57.11 on the supplies for skim coating, this included taping knifes, sheet rock, mud pan etc. Here is a progress shot after I was done!

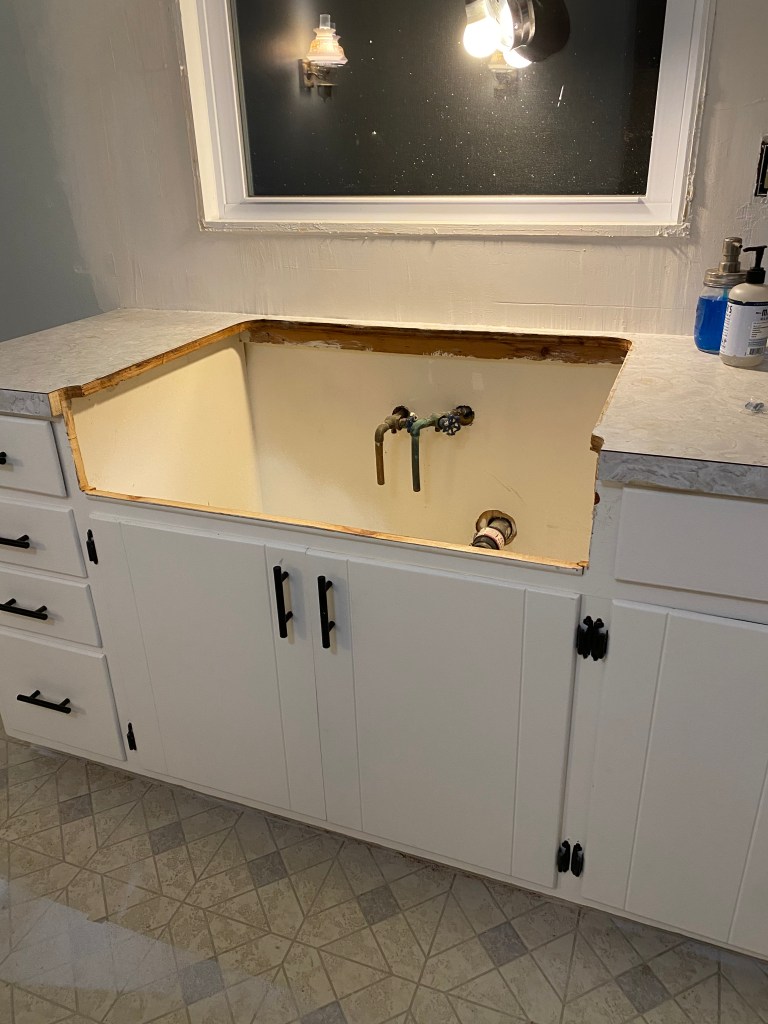
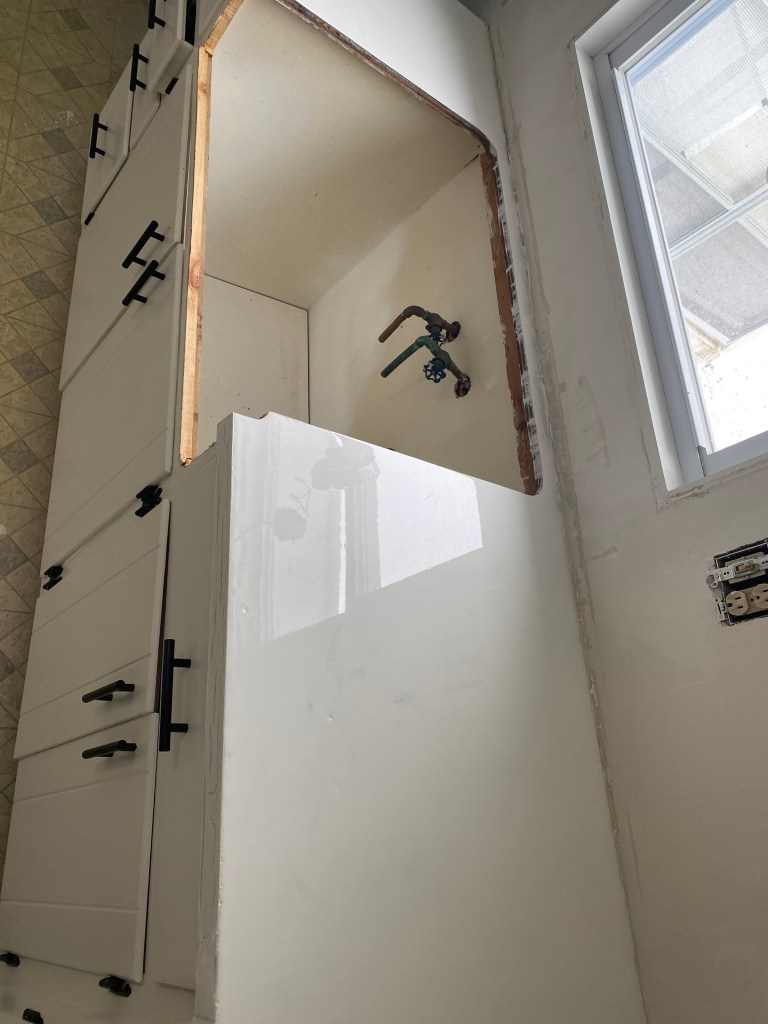
Next up were the countertops. Instead of new counters which would cost a lot of $$$, I used epoxy resin on my existing laminate countertops to mimic quartz. Before I could pour the epoxy I needed to prep, which included cutting the countertop for the sink. On January 1st I finished this step of removing the old sink and cutting the countertop.
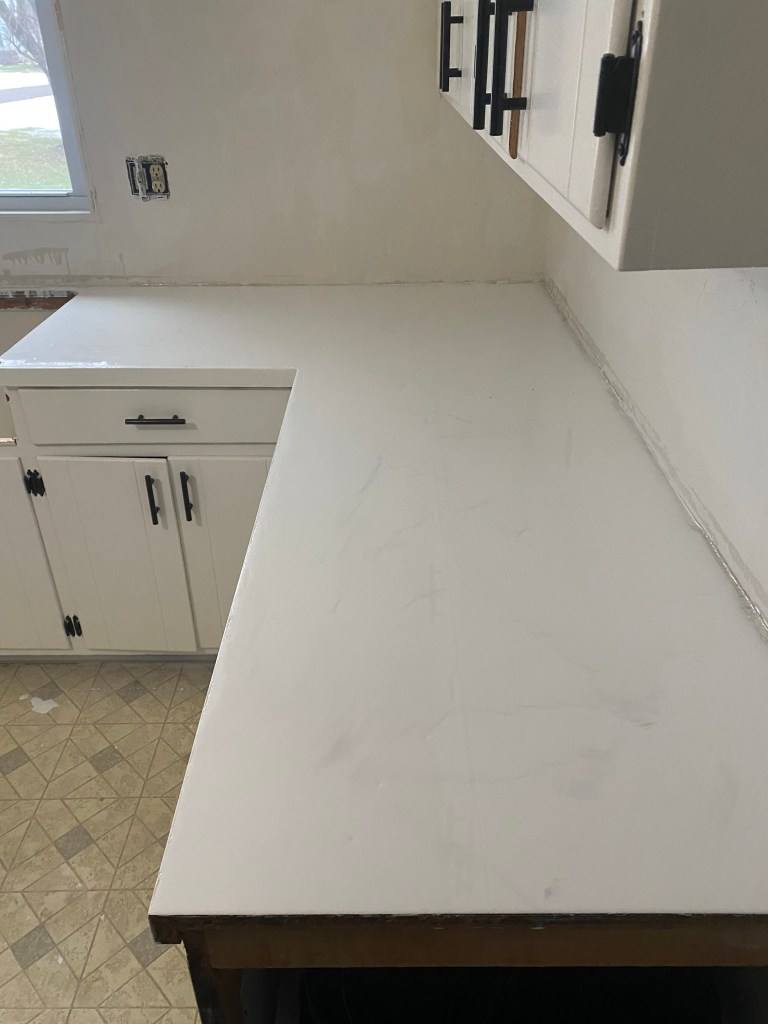
I used white epoxy and hand “dripped” in lines of grey tinted epoxy to create the faux quartz look. This process took a couple days, so by January 4th the countertops were completed. I love how they came out, especially for price! The countertops plus a prybar (for demo) and plastic sheeting (to protect the cabinets during the pouring) only cost me $270.77. This was for sure where I saved a ton of money! Read my tutorial here where I go more into depth on how to epoxy your counters.
Once the countertops were done, I re-directed my attention back to the cabinets. Mainly because I wanted the counters to fully cure before installing the sink. But also because I was trying to research and learn how to install a sink on my own at the time, and it was stressing my out so I needed a mental break haha. The space above the cabinets (where the soffits were) were driving me crazy. So much wasted space, so I decided to make upper cabinet storage out of plywood. This not only created extra storage (or space decorating) but also made the room look bigger by drawing your eye up to the ceiling. The cost of the upper cabinets were only $77.65. Read my tutorial on upper cabinet storage here. This was a very simple DIY and made such a big impact. At this point I was starting to really see the transformation of this space! I had to throw in some decorations, I was getting all excited!

Next up… flooring! I ripped out the nasty old vinyl sheet flooring, and installed Vinyl Plank Flooring (VPF). This was my third time laying VPF. After making plenty of mistakes the first two times, I think I finally mastered the technique. You know what they say third time is a charm 😉 Laying your own flooring may sound daunting but I promise you this is so doable to do on your own. If I can do it, you can! Read my tutorial on VPF here. The cost of the flooring, installation kit, and all of the trim cost me $579.44. I completed the flooring on January 22nd.

You may have also noticed in this picture that I also had new pendant lights installed. I had a wire hanging above the sink that was tucked in the old soffit. I did not feel comfortable messing around with that. This was the one time for this entire kitchen renovation that I hired out. An electrician came and fixed that wire. While he was over, he replaced the two pendant lights for me. The cost of the lights plus install was $199.31. I couldn’t beat it, plus no thank you to getting electrocuted.
Then, after not having a sink in my kitchen for the past month, I was over cleaning the dishes in the bathroom. It was sink time! I really wanted a farmhouse apron sink, but contemplated the price of it. I also had difficulty finding one that would fit my existing countertops. After some research, I found the perfect sink. I bit the bullet and bought my dream sink and have no regrets. I was determined to try and figure out how to install the sink on my own. After a lot of research, I realized I might need some help on this part!! My dad installed the sink for me and I was able to watch the process which was a great learning experience (and free of charge). Hehe thanks Dad, love you! The sink, faucet, PVC and all the other parts for the sink install came to $553.38.

Ugh ain’t she pretty?! January 27th marked the day the sink was installed! Next I planked my ceiling’s. The fact that this cost as much as my countertops kind of makes me cringe. Plywood is super expensive lately. I cut 1/2in plywood (although I could’ve and should’ve used 1/4 in) into 6in strips and nailed them into my ceiling and used a paint stir stick as my spacer. The cost of the planked ceiling was $283.86. Was it necessary… no? But I love how it came out, and it’s always the little details that help REALLY transform a room. I’ve got a thing for ceilings what can I say!

Next, I wanted an accent wall in here. It seemed the best place for one based off how you walked into my kitchen was the wall with the window. I started by trimming the window out with a farmhouse look. Click here for my DIY farmhouse trim post. This cost $33.13. I later painted it white and hated it. Then I decided on a beige/cream color and that is what I settled with.

Next, I did a brick accent wall around the window trim. I have an entire blog post/tutorial on this process, click here for that. The brick was not cheap. At this point in the reno I was still really staying on track with my budget and I was willing to splurge a little bit for the brick. The cost of the wall came to $659.41. This included the brick, tile saw (to cut the brick), grout, and all of the other little stuff I needed. Click here for more information on the brick accent wall install. The accent wall took me 3 days to complete, I finished it on February 13th just in time to enjoy Valentines Day and take a day off to relax.

After I completed the brick accent wall I figured why not add another accent wall in here just to really be crazy. So I applied faux shiplap to my 2 blank boring walls. I had old sconces on these walls, and removed them ON MY OWN. I was super proud and excited to do that can you tell?! It was way easier than I had thought it was going to be. Replacing light fixtures is a very doable DIY. With a little research and some patience you can do it! Like I said before if I can do it you can!


I used 1/4in plywood and cut it into 6in strips for the walls. The total cost of the faux shiplap walls was $170.07. Read my full post here on how to shiplap your walls the cheap way. Here are pictures from February 28th when the shiplap walls were officially complete and new sconces were installed. These were the first light fixtures I installed on my own!

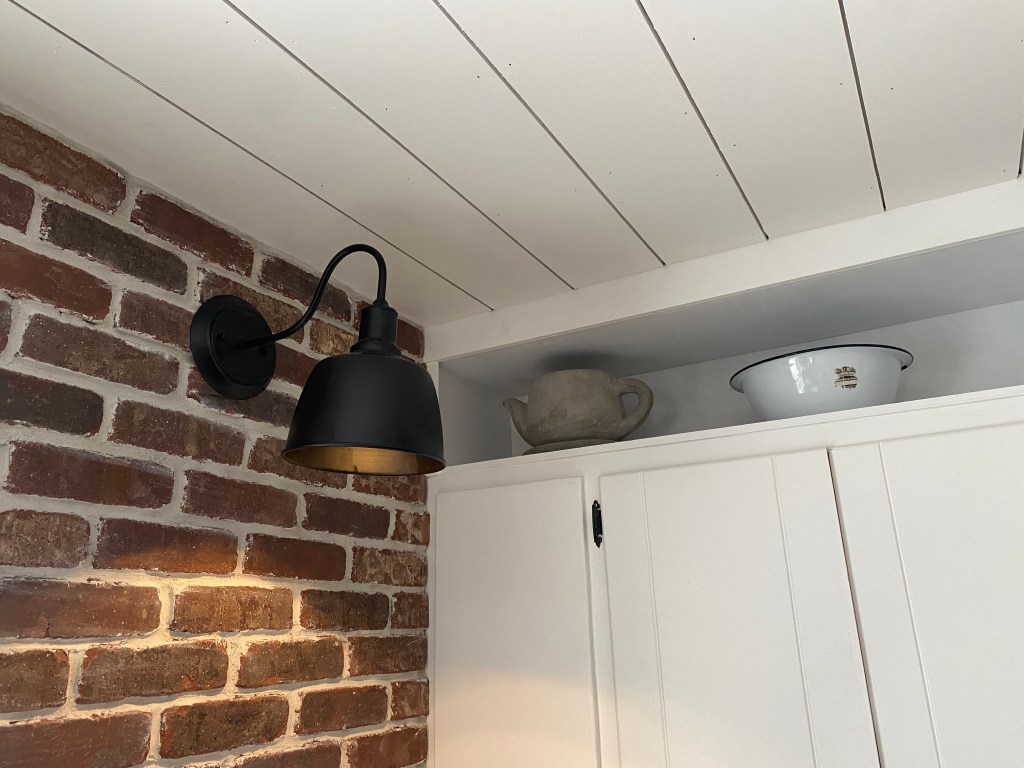
Now that the bulk of the renovation was complete I got to dive into the fun stuff…accessorizing and decorating!! During my demo I ripped out a cabinet, in place of that cabinet I knew I wanted a sconce with open shelving. I added this sconce the easy breezy beautiful way. No electrical work whatsoever. I got this magic light trick idea from @nestingwithgrace on Instagram. It’s the best!! These sconces were cheap off of Amazon, then I added two open shelves underneath. Click here for links to everything, including these sconces.
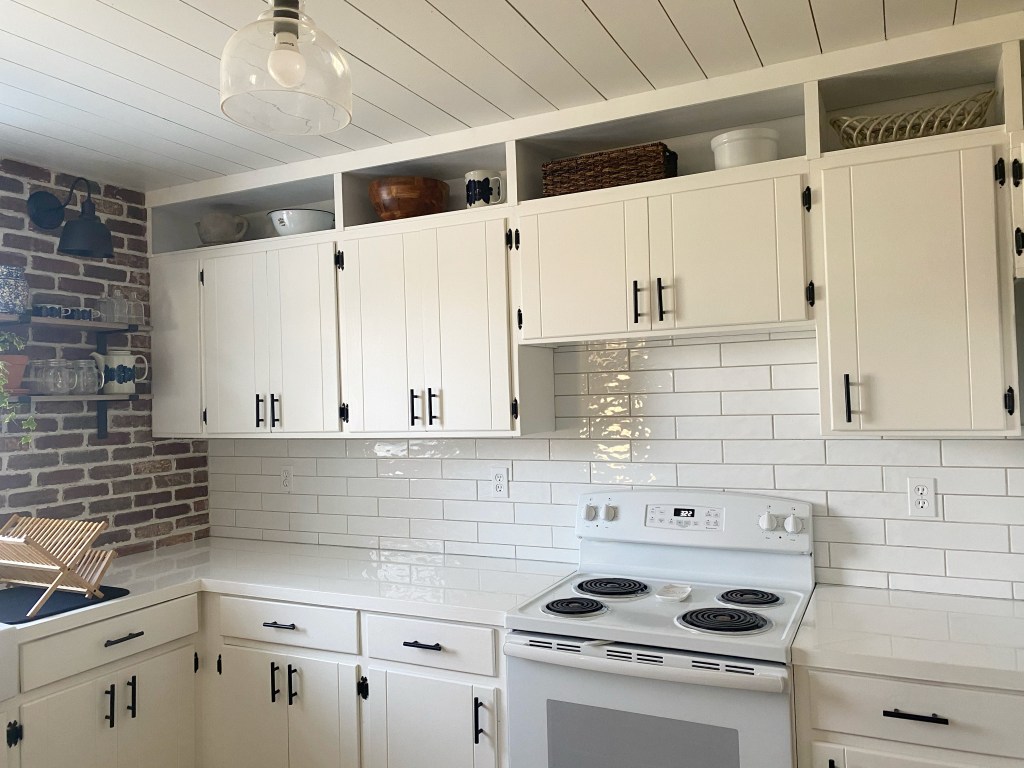
Next on March 9th I completed my tile backsplash. Tiling was another first for me. After already having a tile saw for my brick accent wall, I had some practice. I went with a classic subway tile and this took me 2 days to complete. Click here for my full tutorial/blog post on how to tile on your own! I spent only $152.22 to tile my backsplash. Imagine how much a contractor would charge… Here is how the backsplash turned out!
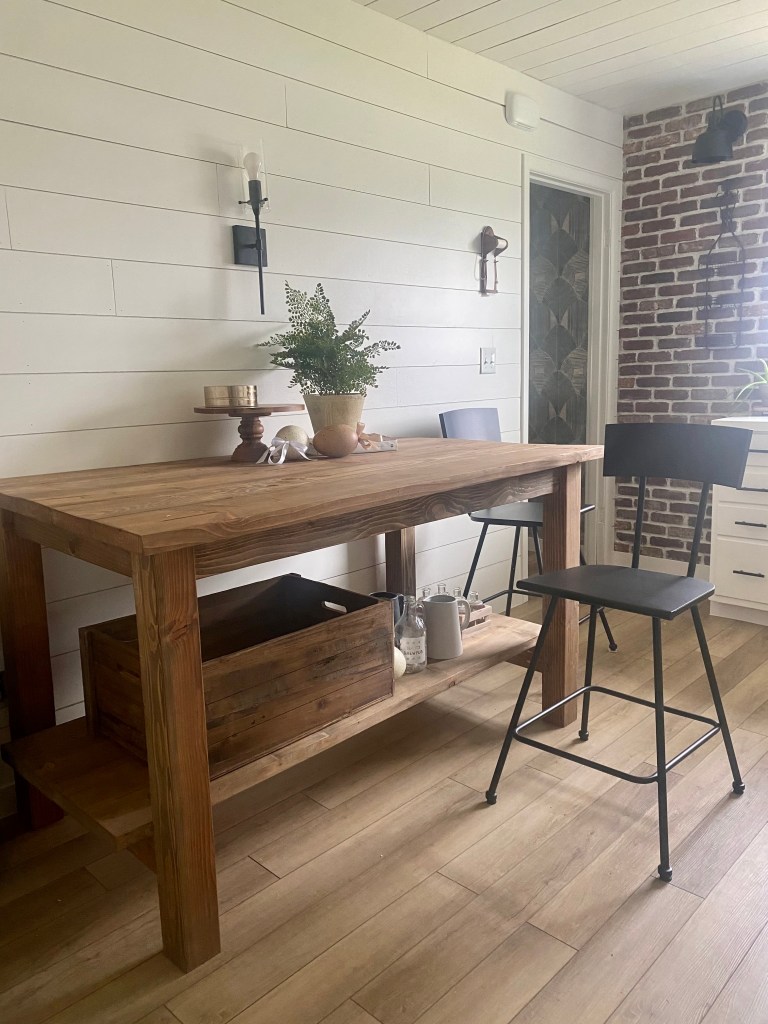
Then I had an entire corner of my kitchen that felt like wasted space. I wanted something practical and that wasn’t going to just to fill space, but that I would use!! I looked for islands and tables but I either didn’t like any of the choices, or they were way out of my budget. I had the crazy idea to just make one instead. I had never made a piece of furniture before. I stumbled across Ana White’s site where she has tons of free furniture plans. I used one of her plans and customized it a bit to fit my space. I made a counter height table/island, with a removable bottom shelf. It will be placed pushed up against the wall for every day use and have the shelf underneath for extra storage. It can be pulled out from against the wall into the center of the kitchen for seating if guests are over. This was such a fun piece to make (until I spent 4hrs sanding it, that wasn’t fun). I love this table. The fact that I made it, makes it even more special! I spent $177.15 on lumber for this table. I had to buy a keg jig and some other supplies, so overall this table/island cost me $309.12.
The final missing piece to my kitchen reno were new appliance. I contemplated between silver stainless steel and black stainless steel. With all of the black accents in my kitchen I decided on black. I splurged quite a bit on the appliances (thank you to those handy stimulus checks ya knowww). I spent $779.41 (with tax) on my stove. It actually was delivered to me slightly damaged (but not too badly that was worth returning in my opinion but home depot was nice enough to reimburse me $150. Then I sold my old stove for $250. This stove took like 2 months to be delivered, it was long wait. Here is a picture from April 1st.

Sadly my fridge is still on backorder, and wont be arriving for another two months. I am so excited for it come! I have never had a fridge with a water dispenser in my life! It’s the little things, ya know! I spent $2,500.79 on this fridge. Sometimes you’ve gotta just treat yo self. Once the fridge arrives, this kitchen will officially be complete.

Cost Breakdown
Cabinets = $427.42
Countertops = $270.77
Skim Coating = $57.11
Sink = $553.38
Floor = $579.44
Ceiling = $283.86
Pendant lights and install = $199.31
Upper cabinet storage = $77.65
Window Trim = $33.13
Brick Accent Wall = $659.41
Shiplap walls = $170.07
4 Sconces and open shelves = $323.75
Tile = $152.22
Door chime = $16.48
Electrical switches and plate covers = $48.50
Paint and brushes = $43.16
Table = $309.12
Total before appliances = $4,204.74 (including tax)
Stove = $779.41
Fridge = $2,500.79
Total after appliances = $7,484.94 (including tax)
Links to every thing can be found here !
I am so so happy with how this space turned out. Now that I look back and just randomly decided to demo my kitchen and get started on this transformation is crazy to me. This renovation has been such a good investment, and I have learned so much throughout the process. I write this post to summarize my journey but to also hopefully inspire someone to tackle home improvement projects on their own. My whole journey started with a not so great contractor and turned me into an avid DIYer and for that I am so grateful. For more follow me on Instagram @abbbclark_homeee. Thanks for reading XOXO.

Your kitchen turned out amazing! I love the fact that you were able to do all of this yourself and have it turn out so good! I’ve been trying to decide between having a local cabinet painting company come out or do try my hand at painting the cabinets myself. Seeing how yours turned out definitely gives me more confidence that I could possibly do it myself and save tons of money! Thanks for sharing!
LikeLiked by 1 person
Thanks Alex, I really appreciate it!! I won’t lie to you, it was definitely a lot of work but so worth it! Very rewarding and yes like you said you save so much money in the end! Thanks again and good luck with yours! Let me know how they turn out!!
LikeLike
What type of wood did you use for your island/ table ? Everything looks awesome!
LikeLike
Hey there, thank you so much!! I used pine and whitewood so it’s actually 2 types of wood becuase I couldn’t find the exact sizes all in the same type of wood! So I just worked with what I could find! Hope this is helpful 😊
LikeLike
Umm absolutely beautiful!! Nice work and thanks for all the info. I will be using it in the near future!
LikeLiked by 1 person
I’m thrilled to hear that you found the comment helpful! It’s wonderful to know that you’ll be putting the information to use in the near future. If you ever have any questions or need further assistance on homeownership or any related topics, feel free to reach out. Wishing you the best on your home journey, and looking forward to your continued engagement with the valuable insights shared here!
Visit us: https://www.ottawa-renovation.ca/
LikeLike